This post, Qlik sense enigma js example using node js and react – Create App, is part of the Qlik sense Enigma.js Example Series. This post will explain how to create a new app.
Prior to this post, please complete the following posts:
- ReactJS – Client setup,
- NodeJS – Server setup
- Create, Open session and list apps
- Display Apps using ReactJS
- Get App Objects List
- Get Definition of App Objects
The above posts will help you get the basic setup, list all the apps in the qlik sense server, open a desired app and list all the master measures, dimensions, visualization, variables and sheets.
The latest working app can be found below
Download CodeWander Enigma JS Example
Important update to the code base.
I have updated the enigma js to the latest version 2.4.0 and used the latest schema 12.170.2.json. There was no issues with the older versions but I wanted to keep this codebase as relevant as possible.
Enigma JS Example Create App
There are two parts in creating the new app. First the server side api that actually interacts with the qlik engine and the client part for user interface. This post (part 1) covers the server side and the next post (part 2) will cover the client side programming using react js.
Server Side Programming
There are two changes on the server side
- Create routes for the client to consume
- Write a function createApp that gets the input and generate a new app
Create routes for the client to consume
In the file .\server\routes\engine.js, a options is created to give app name as parameter. Ideally, a POST request with all other parameters has to be created for a complete implementation. However, for demonstration purpose, I have limited it to app name. There will be another post to modify other properties of the app.
* create new app
*/
router
.route('/apps/create/:name')
.get(enginecontroller.createApp)
Write a function to create an app with name and description
In the file, server/controllers/qengine.ctrl.js, write the function createApp.
var appName = decodeURIComponent(req.params.name);
var qParam = {"qAppName": appName}
qixSession=enigma.create(qix_config);
qixSession.open().then((global) => {
qixGlobal=global;
qixGlobal.createApp(qParam).then(function(qApp){res.json({"qRequest":"createApp","qResponseStatus": "success" , "qResponseMsg":qApp});
},(err)=>{ console.log(err);res.json({"qRequest":"createApp", "qResponseStatus": "error", "qResponseMsg": null})})});
}
Testing the API – Successful Response
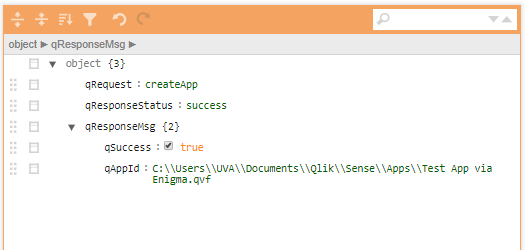
Now restart the server using node app.js command and send the below request from the browser and you will get a successful message as shown
http://localhost:5000/api/apps/create/Test App via Enigma
<pre>Message:
{
"qRequest":"createApp",
"qResponseStatus":"success",
"qResponseMsg":
{
"qSuccess":true,
"qAppId":"C:\\Users\\UVA\\Documents\\Qlik\\Sense\\Apps\\Test App via Enigma.qvf"
}
}</pre>

Testing the API – Failure Response
Now, to simulate a failure response, on desktop, just execute the same web request on the browser. Since the app name is the app id on Qlik sense desktop, you will get “App already exists error” in the console and a failure response as shown below.


Leave a Reply